A sound level meter is a crucial precision instrument used in a wide variety of applications. Including some that you might not expect. Such as manufacturing.
However, unless your job requires you to use one regularly, you might not be aware of how to properly use one for accurate measurements.
In today’s article, we’ll show you how to use a sound level meter for precise noise measurement so your results are accurate and easy to interpret.
1: Calibration and Setup
The first thing you have to do is calibrate the meter. This is necessary for any precision instrument, and it essentially uses a known value to compare its first reading to and adjust accordingly.
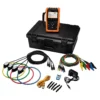
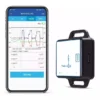
The way you calibrate your meter is going to depend on the exact model you’re using. For instance, the powerful, handheld PCE-432 sound level meter offers data logging and GPS features for detailed noise analysis in the field, while this wall-mounted digital meter provides continuous noise monitoring with a colorful display ideal for indoor settings.
Different models require different calibration steps, so it’s important to follow the instructions provided with your device. Once you’ve followed the calibration steps, there’s a simple setup step you need to complete before moving forward.
The first setup step is to set the weighing scale. Decibels (dBa) are what you’ll use in the vast majority of cases. Other features might also need to be set up if they’re relevant to your use case. For example, when you need a series of stable readings, you might want to use the slow time weighting feature.
2: Place the Meter
When you place the meter, it needs to be placed in a position that is level with your ear, whether you’re sitting on something or holding it out throughout the reading.
The reason for this is that sound levels can vary slightly at different positions, even when a noise is in the same room. You want to know what the people in the room will experience. At least, that’s the case in most professional settings.
If the workers are in a room standing, it’s not as useful to know what they’d experience if they were on the floor for some reason or up in the rafters.
3: Take Your Reading
If you followed the setup corrections, you’ll get a readout in decibels when you start the reading, according to the instructions on your sound level meter. It’ll show up on the display for easy reading.
Using Your Reading
Once you have your reading, it really depends on what you’re using it for. If you just needed to check and see if you’re crossing certain noise levels, you’re done.
If you need to record your readings, it’s usually best to record various conditions impacting the reading, such as distance from the source, positioning, etc. Then, you can analyze all long-term readings against the conditions each time.
Buy the Right Sound Level Meter for Your Needs
So, how to use a sound level meter, and why do you even need one in the first place? You might need to measure sound levels for OSHA requirements, compliance with city requirements, or any number of other things. It’s important to have the right equipment when you do.
At AQ Measurement, we provide the finest precision instruments, such as sound level meters, to professionals, and we’re renowned for our quality and service. Contact us anytime to dive deeper into our product lineup or speak with a specialist if you have any other questions!